
1. Reseal Roof Seams and Vents
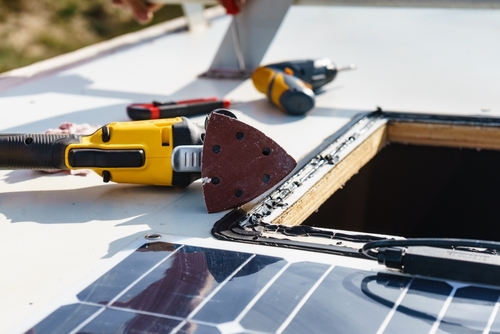
A little bead of sealant can save you from massive water damage later. RV roofs flex and expand with heat and travel, which means seals eventually crack. Water can sneak into insulation and wood framing, causing mold and rot that cost thousands to fix. Spending half an hour inspecting and resealing once or twice a year keeps your roof watertight and stress-free.
Water intrusion is the number-one enemy of any RV, and most of it starts around roof seams. A $10 tube of lap sealant is a small price for avoiding a $5,000 roof rebuild. Many RV owners skip this step until leaks show up inside — which means it’s already too late. Keep a close eye around skylights, vents, and antennas for early cracks or peeling.
2. Tighten Battery Connections
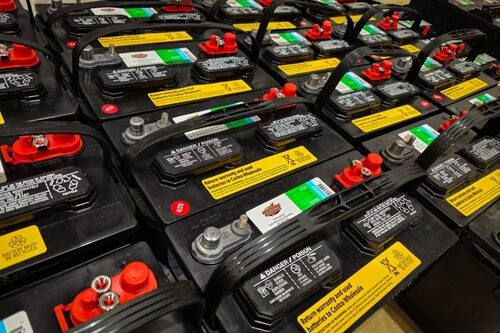
Loose battery terminals can cause flickering lights or worse — fried electronics. The vibration from travel gradually loosens those connections, leading to poor voltage delivery. That strain can ruin sensitive control boards in fridges, furnaces, or inverters. A quick check with a wrench before each trip helps you avoid mysterious electrical issues down the road.
Corrosion is another silent killer here. Even a thin film of white or green residue creates resistance, which heats up the terminals. That can shorten battery life or even melt cable ends. Clean and coat connections with dielectric grease to keep everything stable and safe.
3. Lubricate Slide-Out Seals and Mechanisms
Your slide-outs do a lot of heavy lifting, and they don’t like being ignored. When seals dry out or mechanisms get sticky, you risk tearing the rubber or jamming the motor. A simple spray of slide seal conditioner every few months keeps them flexible and watertight. It also prevents the grinding sound that often signals expensive repairs ahead.
Neglecting this can lead to leaks that damage flooring or furniture inside. Worse, if the slide jams halfway, you might be stranded with it stuck out — and that’s a tow-and-repair situation no one enjoys. Lubricating the rails and checking the rubber saves money and headaches. Think of it like giving your RV’s joints a little stretch.
4. Check Tire Pressure and Age
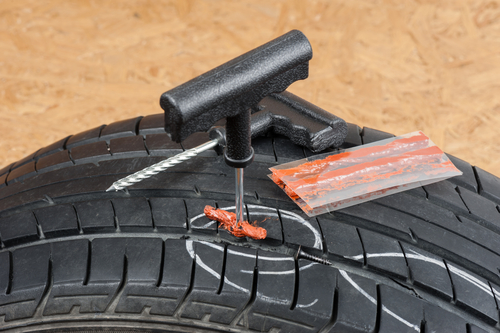
RV tires age out before they wear out. Even if the tread looks fine, the rubber compounds degrade in the sun, and cracks can form on sidewalls. A blowout at highway speed can destroy the fender, plumbing, or wiring under your rig. Checking pressure and tire age before every trip helps prevent both flats and costly collateral damage.
Underinflated tires also run hot, which accelerates wear and increases blowout risk. Overinflated ones reduce traction and make for a harsh, bouncy ride. Use a quality gauge and keep a portable compressor on board. Replace tires every 5–7 years regardless of mileage — your RV (and wallet) will thank you.
5. Inspect and Flush the Water Heater
Mineral buildup can choke your RV’s water heater over time. Hard water leaves sediment that reduces heating efficiency and eventually clogs valves. A simple flush with a wand or vinegar solution keeps things flowing smoothly. Doing this once or twice a season saves you from replacing an entire tank or heating element.
Many RVers forget this until they hear the heater banging or see cloudy water. That sound means sediment is boiling inside — a clear sign it’s overdue for a cleaning. Replacing a heating element or tank can cost hundreds, but flushing costs almost nothing. It’s a small job that makes a big difference in comfort and longevity.
6. Clean and Lubricate Entry Steps
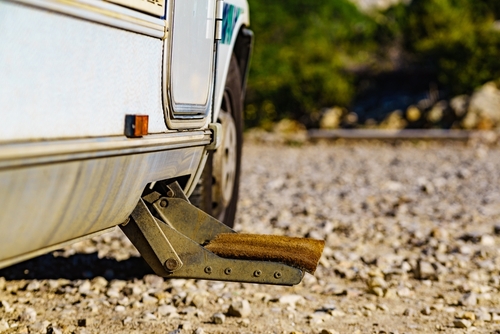
Those metal entry steps take abuse from road grime, moisture, and salt. Without maintenance, they can seize up or snap when you least expect it. A few minutes with a wire brush and lubricant keeps the hinges and pivot points moving freely. That’s especially important if you have electric steps, which can burn out motors when jammed.
When steps stick or rust, repairs often require full replacements. Keeping them clean also helps prevent slipping hazards — a safety win. If you notice squeaks or stiffness, that’s your early warning sign. A can of lubricant is a lot cheaper than a new step assembly.
7. Test and Reseal Windows

Windows are another common leak point that’s easy to ignore. Over time, vibration loosens screws and cracks sealant around the frames. Water can drip into walls, softening the wood and causing hidden rot. Resealing once a year takes less than an hour and prevents thousands in structural repairs.
It’s also a comfort issue — loose seals mean drafts and condensation inside. Recaulking keeps the temperature steady and reduces strain on your HVAC system. Use RV-specific sealant for flexibility and UV protection. You’ll notice your rig feels quieter and cozier afterward, too.
8. Replace Wiper Blades and Check Windshield Seal

It sounds simple, but wiper blades are your first defense against vision hazards. Dry, cracked blades smear instead of wipe, especially after sitting through hot summers. That can stress the motor and scratch your glass. Replacing them once a year avoids both visibility issues and expensive windshield replacements.
While you’re there, inspect the rubber gasket around the windshield. Sun and movement can create tiny gaps where water sneaks in. Left unchecked, that moisture seeps into the dash or electrical system. A quick reseal can stop a slow drip from becoming a serious short.
9. Tighten Plumbing Fittings
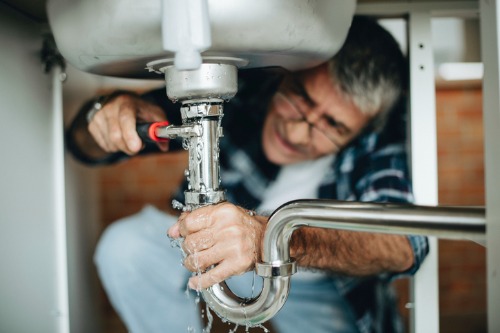
RVs vibrate constantly on the road, and that movement loosens fittings under sinks and behind panels. A tiny drip left unnoticed can soak into cabinetry or flooring. That’s especially true for plastic fittings, which can crack if overtightened but leak if too loose. Taking a few minutes to snug everything up each season prevents mold and warped wood.
Look for damp spots, swelling, or discoloration — all early signs of leaks. A flashlight and a few paper towels are all you need for inspection. Tighten by hand first, then use pliers if needed. That simple check can save you from gutting half your bathroom later.
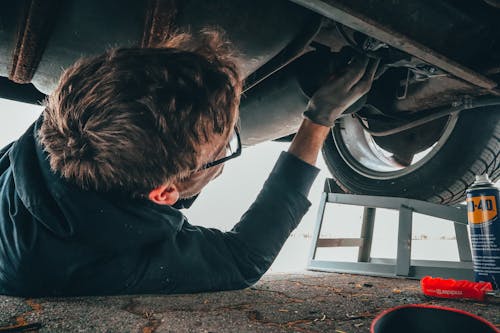
10. Inspect Brake Components
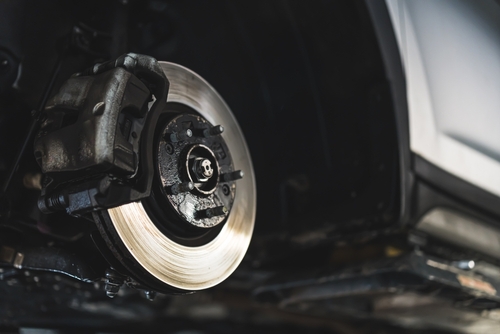
Your RV’s weight puts serious stress on its braking system. Pads, rotors, and drums wear faster than you might think, especially on mountain drives. Catching wear early keeps you safe and prevents rotor warping or hub damage. Checking them annually can save thousands and avoid dangerous failures on the road.
If you feel pulsing, hear squealing, or notice longer stopping distances, don’t wait. RV brake jobs are expensive because of labor and parts — but catching issues early often means a simple pad swap. Grease the bearings and check the brake controller while you’re at it. It’s peace of mind every mile of your trip.
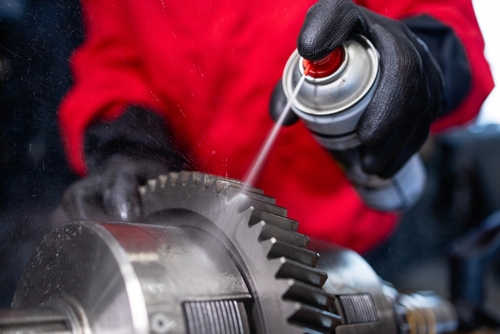
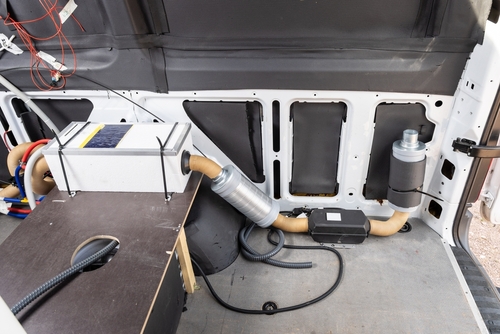
11. Service the Generator
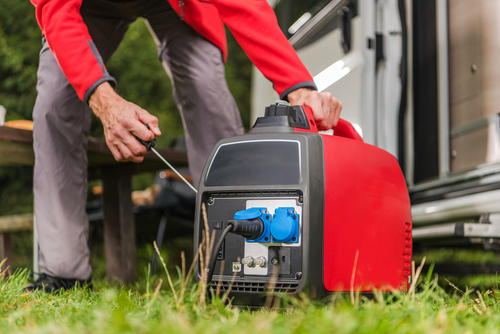
Your onboard generator is easy to forget until you need it most. But old oil, dirty filters, and carbon buildup shorten its life dramatically. Running it monthly and changing oil on schedule keeps it reliable and smooth. That’s critical when camping off-grid or during a power failure.
Neglecting service can lead to clogged carburetors or seized parts, which often cost more to fix than replace. Generators don’t like to sit unused — they need circulation to stay healthy. Running under load for 30 minutes each month keeps moisture and varnish from forming inside. It’s a small ritual with a big payoff.
12. Check and Reseal Underbelly Penetrations
The underside of your RV faces road spray, salt, and debris that can tear open small gaps. Those holes let in water, bugs, or even rodents. Inspecting and resealing cable or pipe entries takes minutes but prevents major damage. Once water gets into the underbelly insulation, it’s almost impossible to dry without removal.
Many owners never think to look down there until a problem starts. Flexible sealant or expanding foam can close those vulnerable spots easily. It also helps maintain heat efficiency by keeping cold air out. A quick crawl under your rig once a year pays off every season.
This post 12 Tiny RV Repairs That Prevent Thousand-Dollar Breakdowns Later was first published on Greenhouse Black.